Use the hidden magnifying glass on your iPhone

Most of us don’t carry a real magnifying glass around in our pocket or purse, but there are times when it would sure come in handy, like when you’re trying decipher the fine print in a contract or instruction manual, or when you’re trying to find the annoying sliver in your finger. But no magnifying glass, no problem. You can just use your iPhone instead.
The iPhone’s camera works out wonderfully as a magnifying glass when you need it, so you can finally decipher the details of the menu at your favorite restaurant or figure out the elusive serial numbers on your electronics.
Harnessing your iPhone’s magnification powers involves a simple settings tweak and knowing what to do to summon the camera in magnification mode.
Turn on Magnifier

Apple built the Magnifier feature into its iOS accessibility options. To get there, open Settings, tap on General, and choose Accessibility. There are a lot of settings available here, but the one you want is simply called Magnifier. Tap on this and then on the toggle switch to turn it to green.
As Apple explains, “Magnifier lets you use your device’s camera to quickly magnify your surroundings.” The Auto-Brightness option allows the feature to adjust brightness and contrast based on the ambient light. You can also just adjust these settings manually when you use Magnifier.
Here’s what you need to know about Apple’s new iOS 12.
Using Magnifier
The way you turn on the Magnifier feature may vary with which device you’re using. Earlier iPhones let you access Magnifier by triple-clicking the home button. If you have an iPhone without a home button, like the iPhone X or XR, then you can quickly turn on Magnifier by triple-clicking the phone’s side button. The Magnifier function also works on iPads.

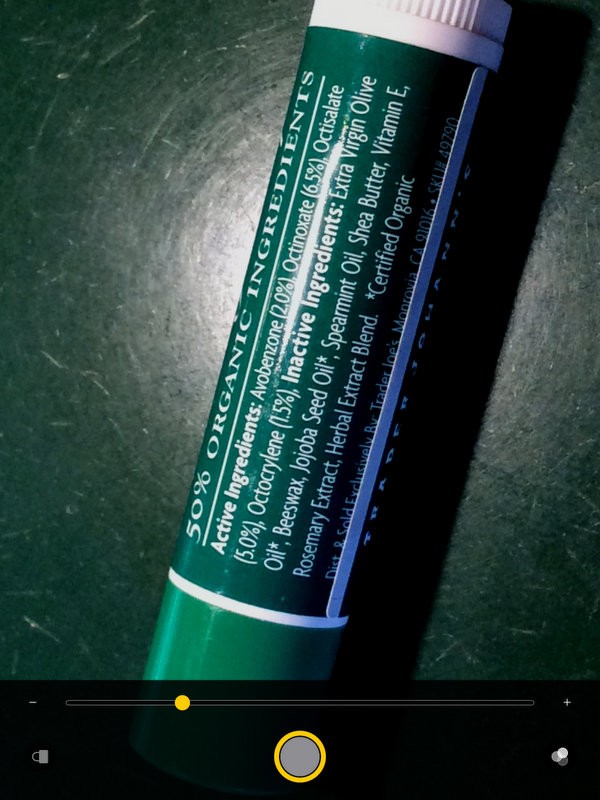
Once Magnifier is open, you will see a view of your surroundings on the screen courtesy of your camera. A slider along the bottom of the display lets you zoom in and out. The round button let you snap a picture of what you’re looking at.
The three circles on the lower right-hand side let you play around with filtering options, brightness and contrast. The filters range from grayscale to red/black or yellow/blue options. These filters can help people with visual impairments better see what they’re looking at.
The contrast and brightness adjustments can come in handy to illuminate small print or objects in dark settings. For example, upping the brightness can make it easier to see what’s listed in the fine print on the menu in a restaurant with dim lighting.
Check out these 5 fun tweaks you can make to your iPhone.
There are a couple more options on the main magnifier window. The lock icon locks the focus while the lightning bolt turns on your flash to light up whatever you’re looking at. If you’re using this feature on an older device like an iPad without a built-in flash, then you won’t see the lightning bolt, but the rest of the settings will still work.
The Magnifier feature for iPhones can be a great helper as you go about your day. It’s there for you if you forgot your reading glasses. You can use it to get fabulous close-up looks at rocks and leaves when you’re out on a hike. Get used to harnessing the magnifier and you won’t have to sweat the small stuff ever again.
Bonus tip: Make text larger on your iPhone
If you find yourself squinting at your iPhone or struggling to read what’s on the screen, then you should try out a larger text setting to make reading easier on your eyes. Head back into Settings and tap on General and then Larger Text. Here, you can turn on the “Larger Accessibility Sizes” to choose a larger font size. The slider at the bottom lets you adjust it to your liking. You can try different sizes to find the sweet spot between usability and readability for your iPhone.
Tags: Apple, Apple iPhone, camera, computer, Feature, home, phone, settings
