Facebook custom avatars have arrived – here’s how to create your own

How do you express your emotions on Facebook? Do you rely on a reaction or GIF? Maybe you prefer to use one of the many stickers available?
Perhaps you merely type out your feelings and exaggerate with a few exclamation points!!! Tap or click to learn how what you post on social media could be used to diagnose a medical condition.
No matter your mode of expression on the social media platform, Facebook recently announced you can now create a customized avatar to help you express away. Let’s get to making your avatar — one that’s perfect for any Facebook post.
Say “hello” to your virtual mini self
Similar in appearance to that of Snapchat Bitmoji, these avatars are customizable. They can be used in comments, Facebook stories, Messenger, set as your profile image, or even used outside of Facebook.
You may also like: Find out how Facebook is taking on Zoom
While these avatars don’t track facial movements like Apple’s Memoji, they are new to U.S. Facebook users, so it’s possible a similar feature will be possible in future versions.
There are a few things worth noting before we get started:
- All, but a few of the beginning steps are the same for both iPhone and Android.
- Currently, you cannot create an avatar on your desktop or laptop. However, you can see and share your avatar on both.
How to create a Facebook avatar
Open Facebook on your mobile device. iPhone users tap the three-line menu in the lower-right corner, scroll down and tap on See More > Avatars. Tap Next > Get Started.
Android users click the three-line menu in the upper-right corner of your device and click on Avatars. Tap Next > Get Started.
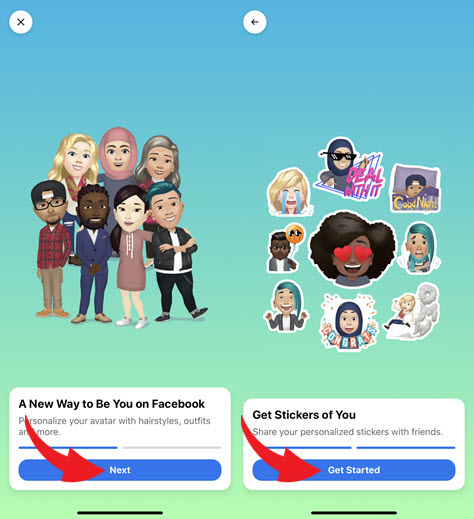
Note: From here on out the steps are the same regardless of device.
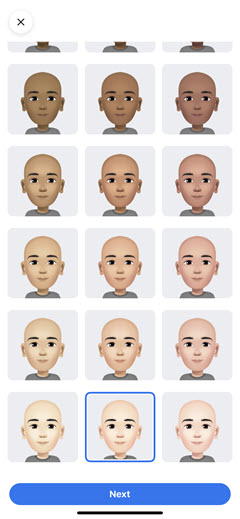
Once in the avatar builder, select a skin tone and click Next.
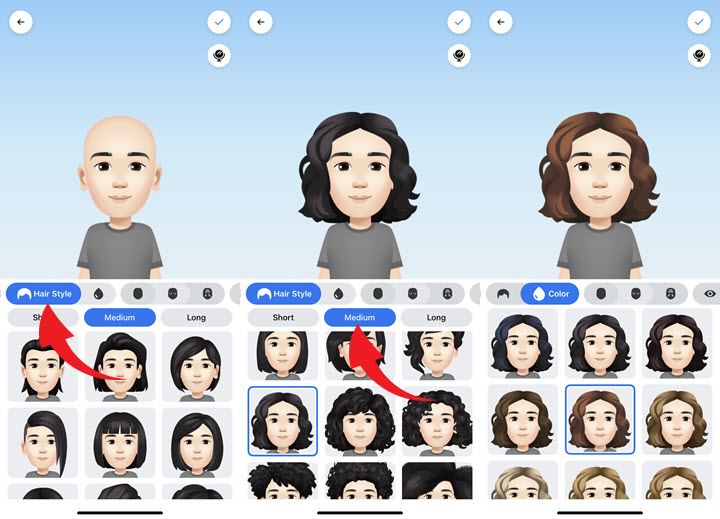
Now you can customize your avatar’s characteristics by scrolling between the sections. Let’s start with hairstyle including length and color.
Next, it’s time to select your facial features such as shape and complexion. You can even add some lines/wrinkles.

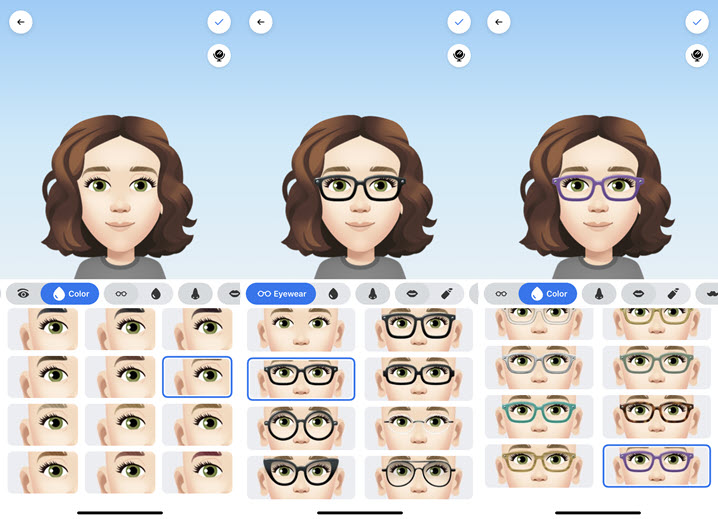
Choose your eye shape, color and makeup (which is the only way to get eyelashes).

Select your eyebrow shape/color and eyeglasses/color.
Choose your nose shape, lip shape, and shade of lipstick if desired.

If you have a beard or mustache here’s your section, select whichever option fits you best.

Next, it’s time to choose your body type and outfit. Although the number and type of outfit selections are limited, look for more options in later updates.

Last, but not least, select head wear and color.
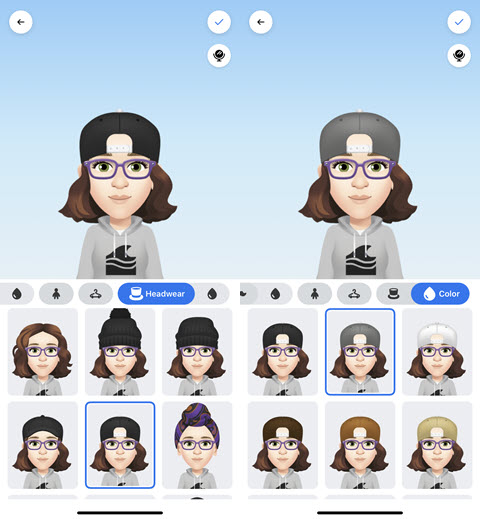
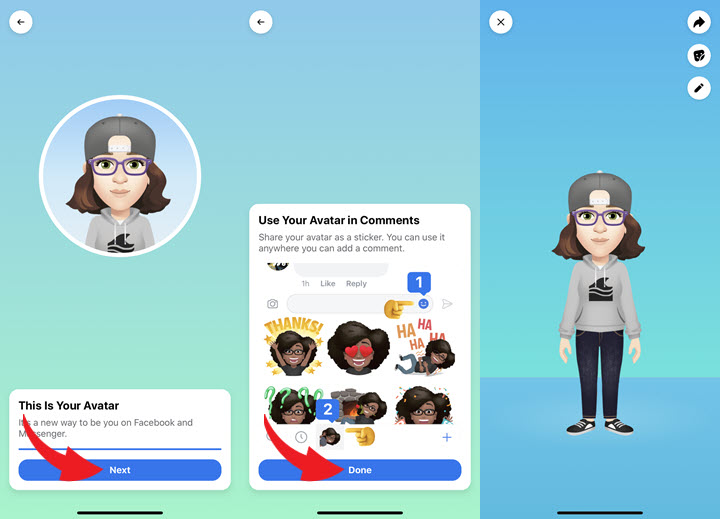
When you’re finished customizing, you can tap the checkmark in the upper-right corner to save your new avatar, or if you need to start over select the back arrow to make changes to your creation. If at any point you want to take a closer look at your real face hit the mirror icon below the checkmark and your phone’s front-facing camera will launch.
Click Next > Done. Say “hi” to your avatar.
How to use your avatar on mobile devices
To use your avatar in a comment, tap the emoji icon in the comment box and select the Avatar sticker you want to use. Then, tap the send arrow.
If you want to use your avatar in Facebook Stories, open Stories editor, take a photo or video and tap Stickers in the top-right corner. Select an avatar, edit to fit your story, and click Share to Story.
In Messenger, click the emoji icon in the comment box, tap Avatar stickers, and select the avatar sticker you want to use.
How to share your avatar on your desktop
To use your avatar in a comment, click the stickers icon, select the avatars section, and tap on the one you wish to post. For Messenger, click the Stickers icon, tap an avatar sticker to share.
Regardless of the device, you don’t have to make your avatar Facebook exclusive. Once you save your mini self simply click the three-line menu on Facebook and tap on Avatars which will bring you back to your avatar builder.
You may also like: How Facebook makes it easier to take back your photos
In the upper-right corner, the middle icon will now be a sticker option, tap on it. To send in a text, select an avatar sticker > more options > your messaging app, enter the recipient’s info, and hit the send arrow.
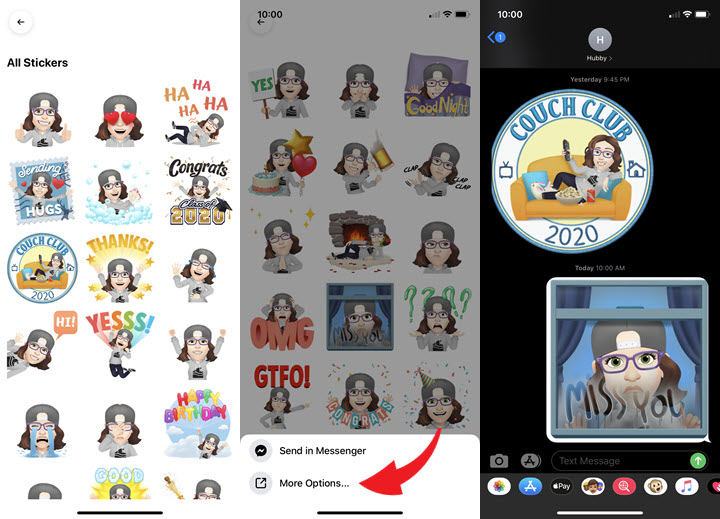
Other options include sending a sticker email or saving the image to your computer. Have fun!
Tags: Android, Apple, Apple iPhone, avatars, computer, desktop, devices, Facebook, laptop, messaging app, Messenger, mobile device, social media, stickers, stories, video
