One setting anyone running Windows 10 needs to change now

Despite your best practices, your gadget’s rechargeable battery will not last forever. After a few years of use and continuous charge and recharge cycles, your battery will eventually wear down and it won’t hold a charge as efficiently as before.
You will inevitably notice that your laptop’s battery level readings are way off and very inaccurate. It might say that you have an hour of battery life remaining but minutes later, it’s depleted and shutting down.
This could mean two things – one, your laptop’s battery is really on its way out, and two, your battery levels need recalibration.
Battery level recalibration
To have a clearer overview of your laptop battery’s condition, prevent battery level misreadings and false alarms, you will have to recalibrate your laptop’s battery. This way you can prevent surprise shutdowns and assess if you really need a new battery. Here’s how you do it on Windows 10:
1. Change your Power Plan
Before you start the recalibration process, please change your Windows 10 laptop’s Power Plan settings to prevent it from going to Sleep or Hibernate mode too soon. You also want to set the display to never turn off when idle.
Here are the steps for adjusting your Power Plan for battery calibration:
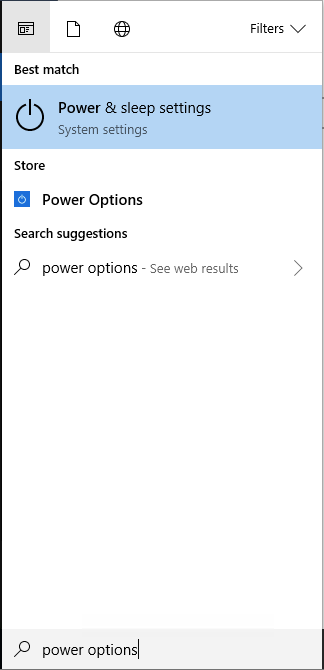
Search for Power Options on your search bar then select “Power & Sleep settings.”

Next, on the Settings window, click on “Additional power settings” then on the left pane click on “Change when the computer sleeps.”
On the next page, select “Never” on the drop-down boxes on both “Turn off the display” and “Put computer to sleep.”

Now, click “Change advanced power settings.” Click the plus sign next to “Battery” to expand it then under this section, expand “Critical battery level.” Here, set the “On battery” and “Plugged in” percentages to as low as possible (preferably under 5 percent). Click Apply >> OK >> Save Changes and you’re done.
2. Fully recharge your battery
Once your Power Plan settings are set to prevent your laptop from going to Sleep or Hibernate mode, plug it in then charge it back up to 100 percent.
Keep an eye on its charge level. Once it hits 100 percent, let it rest but keep it plugged in for an additional two hours to let the battery cool down.
3. Unplug then discharge
After two hours of cooling down your laptop’s battery, you can now unplug it from power then let it discharge completely.
If you modified your Power Plan properly, it shouldn’t go to Sleep or Hibernate mode during the discharge process. You can also use the laptop and play looping videos at this time to speed up the discharge process.
4. Charge it back up

After your laptop’s battery is completely drained (it will automatically turn off), plug it back in and recharge it all the way back to 100 percent. Don’t worry about leaving your laptop idle since you can use it normally during the recharge process.
Once it’s all juiced back up, your battery should be calibrated properly and Windows 10 will give you a more accurate level reading.
Don’t forget to change back your laptop’s Power Plan to your desired settings once you’re done.
Also, for consistent battery level readings, it’s recommended that you recalibrate your laptop’s battery on a regular basis, preferably every few months.
Optimize Windows 10 for longer battery life
Do you want to get more out of your Windows 10 device’s battery? Here are three secret tips to extend your Windows 10 device’s battery life.
Tags: battery, computer, Microsoft Windows 10, settings
